|
Experiments with
Compact Fluorescent lights.
 since 07/28/07 since 07/28/07
|
|
| I've been fascinated with Compact
Fluorescent lights (CF) ever since they appeared on the market. I
mean, how do they get that much light out of that small bit of glass and
phosphor? How do they make 'em so cheap? Being of an
experimental nature, I decided to find out. The first thing I decided to
do was to cut open a CF tube, attach some neon electrodes and see how the
tube operated as a neon tube.
|
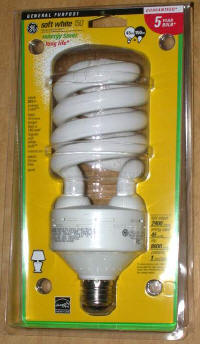
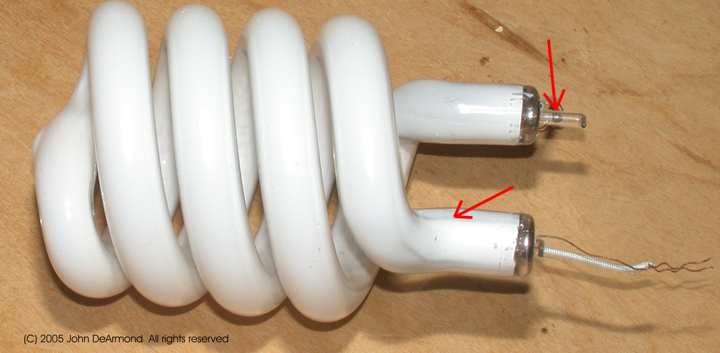
 The candidate device is pictured to the left. This is the largest,
brightest unit available as of this writing. The tube, liberated from
its mount is shown above. The top arrow points to the mercury releasing device. I though it was
a blob of mercury but a closer exam shows it to be a solid. The bottom
arrow points to a thick buildup of phosphor. Sloppy. So thick
that it impedes light production. |
|
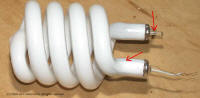
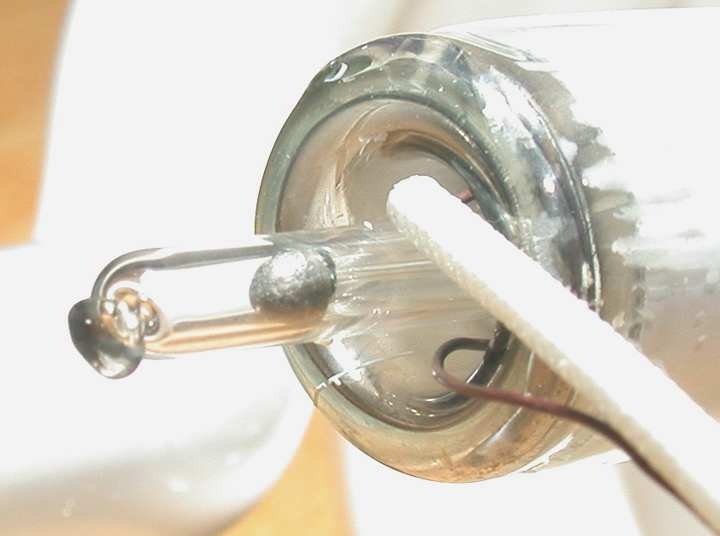
| This is a close-up of the mercury
release device. I don't yet know what it is made of, though I suspect
it is an amalgam. |
 Click to Enlarge Click to Enlarge |
| |
Here I'm cutting off the existing
electrodes with a Kitco hot wire tube cutter. I hold the switch on the
Kitco until the wire loop reaches a dull red. Then I remove it and
touch a wet finger to the glass. It parts at the heated line.
Like magic. |
 Click to Enlarge Click to Enlarge |
| |
This is what the inside of the
tube looked like. This unit had failed after an electrolytic cap blew
out from overheating. This caused the electronic ballast to
malfunction and over drive the filaments. One had burned out
completely. Both had sputtered the inside of the tube black. |
 Click to Enlarge Click to Enlarge |
| |
Here is one of the original
electrodes. No wonder fluorescent lamps burn out so quickly! |
 Click to Enlarge Click to Enlarge |
| |
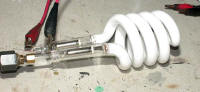
Here's the tube with neon
electrodes attached and the whole thing installed on the bombarder, ready to
be bombarded. Unfortunately the first shot of bombarder power resulted
in one of the bends cracking. Therefore the rest of the photos will
show one electrode sticking out the side. |
 Click to Enlarge Click to Enlarge |
|
| |
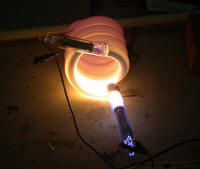
In this photo we see the tube
filled with about 4mm Hg of argon and illuminated at 60 ma. It is
quite curious that the phosphor glows this gorgeous magenta even though the
phosphor is a dull orange under a UV color checker. The arrow points
to the thick layer of phosphor on the bottom of the tube. The light
output is greatly reduced here. |
 Click to Enlarge Click to Enlarge |
|
| |
In this photo I have just fired
the mercury capsule contained in the Masonlite QuickSilver electrode.
The mercury is just starting to migrate through the tube. It is
evident here just how much the mercury contributes to the brightness of the
tube. |
 Click to Enlarge Click to Enlarge |
|
| |
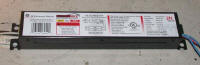
One of my objectives was to see if
I could operate the tube at its original intensity using neon electrodes
which will last essentially forever. This requires more current than
neon uses so I decided to try a fluorescent ballast. Specifically this
one. This is an electronic ballast designed for 2 4ft tubes. It
was the only small electronic ballast I could find at Home Depot.
|
 Click to Enlarge Click to Enlarge |
|
| |
Here's the result. The tube
is lit from the fluorescent ballast. The Seaquest tube in the
background was attached to the ballast to load the other output, though the
instructions say it isn't necessary. I used a lot of fill flash in this
photo to try and capture the tubes accurately. These tubes are BRIGHT.
Too bright to look at comfortably. This ballast can't drive the tube
as hard as the original electronics.
As of this writing this setup has been running for about 3 weeks.
The ballast is just barely above room temperature which means it is happy.
The tubes run warm as is to be expected, but not excessively so. Most
important, there appears to be no sputtering of the electrodes even though
they are running at a current density much higher than spec.
BTW, that large lamp in the background is a 2500 watt theatrical lamp.
Rated at 25 volts, 100 amps. It lights up nicely with my stick welder!
|
 Click to Enlarge Click to Enlarge |
|
| |
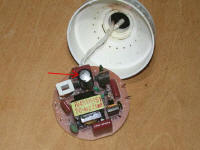
Speaking of the original ballast,
here it is.
The red arrow points to the capacitor that blew up. Note the general
signs of overheating. The thermal management in this light leaves a
lot to be desired. It only ran for about 3 months before the cap blew
out. |
 Click to Enlarge Click to Enlarge |
|
| |
My conclusion is that this
experiment is a success. CF tubes can be refitted with "permanent"
cold cathode electrodes, processed as a neon tube and then be operated from
a fluorescent ballast. My next experiment will be to find a higher current
ballast, perhaps for high intensity lamps, and give that a shot. |
|
|
| |
|
|
|
| |
|
|
|

 Custom Search
 Click to Enlarge
 Click to Enlarge
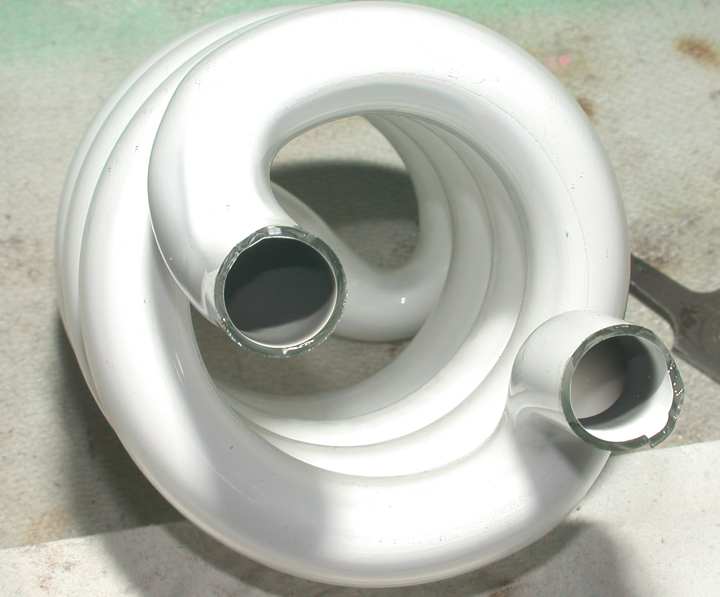 Click to Enlarge
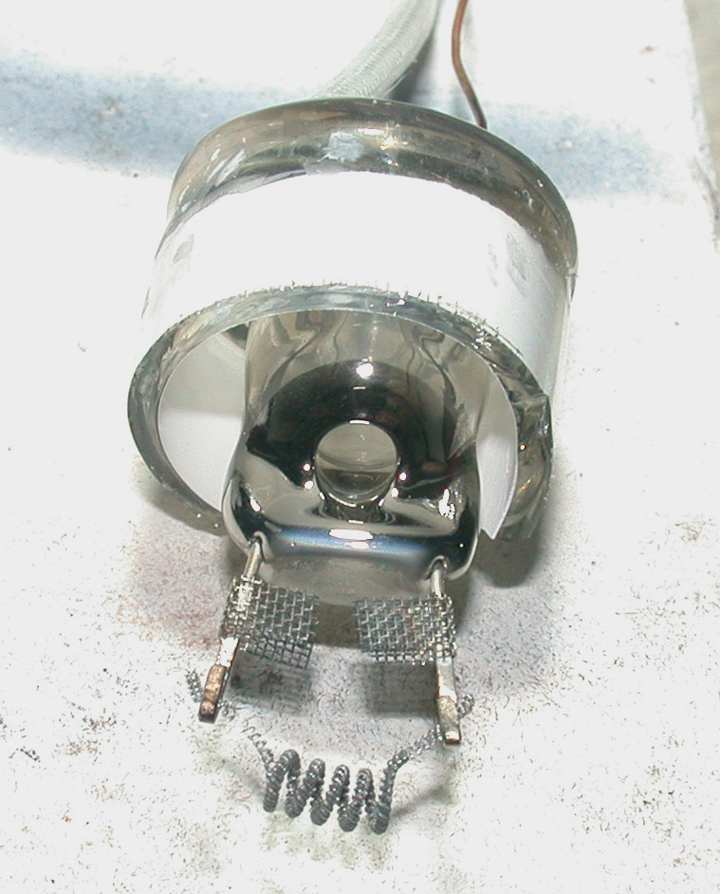 Click to Enlarge
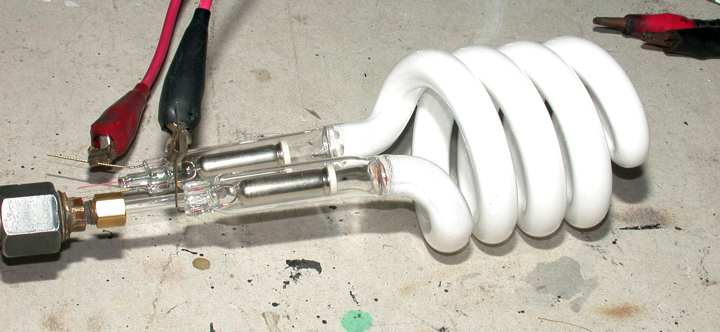 Click to Enlarge
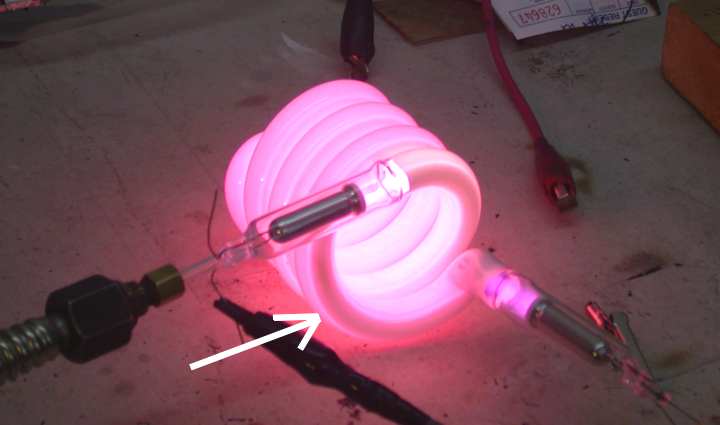 Click to Enlarge
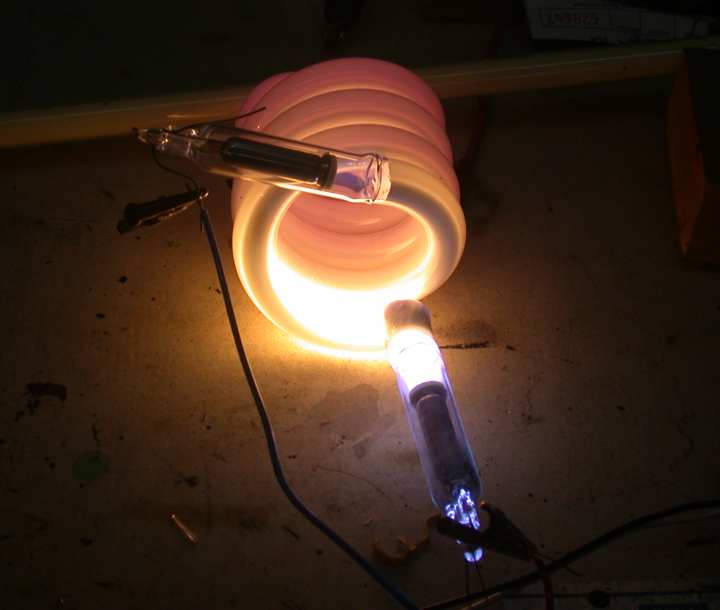 Click to Enlarge
 Click to Enlarge
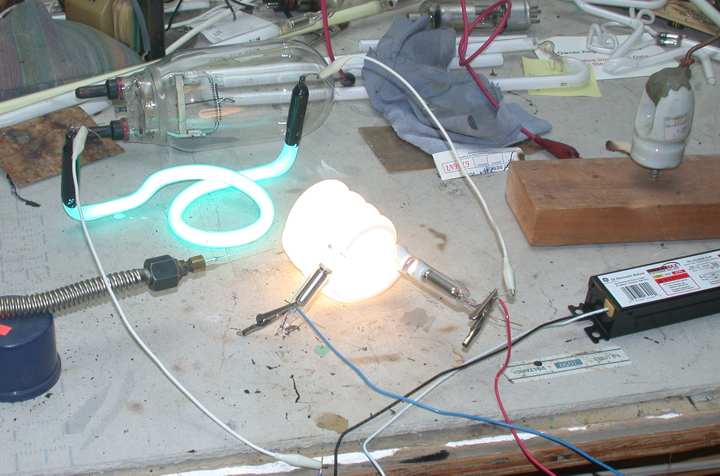 Click to Enlarge
 Click to Enlarge